

With Outlook on your PC, Mac or mobile device, you can:
Organize email to let you focus on the messages that matter most.
Manage and share your calendar to schedule meetings with ease.
Share files from the cloud so recipients always have the latest version.
- Stay connected and productive wherever you are.
This knowledge article covers using Outlook for Windows. To learn about other Microsoft Outlook platforms:
Click to learn about Outlook on the web
Click to learn about Outlook for MacOS
When using Outlook for Windows
I want to:
- Set up an email signature (this links to KB article from the Communications team)
Get started with the new Outlook
The new Outlook for Windows brings the latest features, intelligent assisted capabilities and a new modern and simplified design to your Outlook app. You can tailor it to your style and do more with new Outlook for Windows!
Click here to watch a short video about the new Outlook
Classic Outlook on Windows
If your accounts are supported in the new Outlook for Windows, you'll see a toggle in the upper right of classic Outlook to Try the new Outlook. Selecting this toggle will download the new app and let you switch to the preview.
The new Outlook for Windows will launch into the account you have set as your default send account in Outlook. If Outlook can't sign you in automatically, manually type in the account and sign in.
If this is the first time you're switching to the new Outlook, you'll be prompted to bring over your settings from the classic Outlook for Windows. Select Import Settings if you want to bring them over, or choose Skip. To learn more about what settings are imported, see Migrate your settings to the new Outlook for Windows.
Create, send, reply & forward an email
Watch a short video on how to create, send, and reply to an email
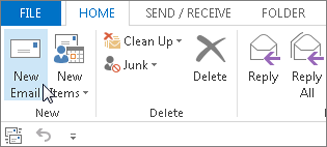
Click New Email, or press Ctrl + N.
If multiple email accounts are configured in Microsoft Outlook, the From button appears and the account that will send the message is shown. To change the account, click From and pick the account.
In the Subject box, type the subject of the message.
Enter the recipients' email addresses or names in the To, Cc, or Bcc boxes. Separate multiple recipients with a semicolon.
Tip:
As you start typing a recipient's name, Outlook will suggest the names of people you've emailed before. Those you've emailed most recently will be listed as Recent People and those you've emailed less frequently will appear as Other Suggestions. You can pick a name from the list, type a full name or email address, or click To, Cc, or Bcc to select a name or names from the address book.To select recipients' names from a list in the Address Book, click To, Cc, or Bcc, and then click the names that you want.
I don't see the Bcc box. How do I turn it on?To display the Bcc box for this and all future messages, click Options, and then in the Show Fields group, click Bcc.
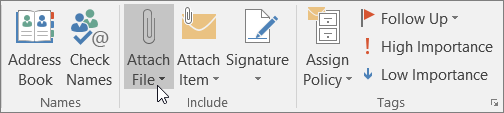
Click Attach File to add an attachment. Or click Attach Item to attach Outlook items, such as email messages, tasks, contacts, or calendar items.
Tip: If you don’t like the font or style of your mail, you can change the way it looks. It’s also a good idea to check the spelling in your message before sending.
After you finish composing your message, click Send.
Reply to or forward an email message
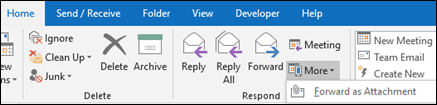
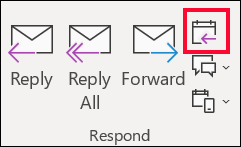
From a message you've received, select Reply, Reply All, or Forward. These buttons can be found in several different places depending on your screen resolution and version of Outlook. You can find them at the top of your Reading Pane, alongside the right edge of the message, or on the main Outlook ribbon.

Write your message.
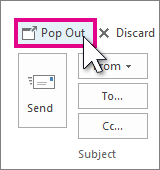
Note: If your reply or forward opens in the Reading Pane and you’d like to open your reply in a new window (so you can do things like change the font), look for and click the Pop Out button.
Recipients can be added or removed in the To, Cc, and Bcc boxes.
Add a recipient Click To, Cc or Bcc, and then select a recipient. You can also type the recipient’s name or email address in the box.
Remove a recipient Click the name and then press Delete.
Check the subject line. The subject line for a Reply is automatically set to show “RE:” in front of the original message subject. You can change this by simply typing in the subject box or you can leave it as is. Forwarded messages have “FW:” in front of the original subject.
- Click Send.
Tip & Tricks:
If you want all replies to automatically open in a new window
From the File menu, click Options > Mail. Under Replies and forwards, check the Open replies and forwards in a new window box.
Reply only sends the new message to the original sender. Attachments are not included.
Reply all sends the new message to the original sender and all other recipients on the To and Cc lines. Attachments are not included.
Forward allows you to type in a whole new set of recipients. Any attachments included in the original message are automatically included when you forward a message.
Why aren't attachments included when I reply to a message?
When you reply to a message, attachments aren't included because you'd be sending the exact same attachment back to the person who sent it to you. There is no way to change this behavior. Once you click Reply or Reply All, you can attach a new version of the original file or any other file you'd like to include. If you need to send a message with its attachments to other individuals, use the Forward option.
Should I reply or reply all?
Before you click Reply All, consider whether everyone needs to see your reply, especially if the message was sent to a lot of people or distribution lists. It's often better to click Reply, and then add only the people you really want to include. Or, if you decide to click Reply All, remove people who don’t need to see your message.
Can I forward multiple messages at once?
If you want to forward two or more messages to the same recipients as one message, select the messages you want to include in the message list. Click the first message, then hold the Ctrl key as you select the additional messages. Once you've selected all of the messages you want to forward, click Forward on the main Outlook Ribbon to create a new message with your other messages included as attachments.
Can I have all replies and forwards open in a new window?
You can have Outlook automatically open all replies and forwards in a new window (not in the Reading pane).
Select File > Options.
Select Mail, then scroll down to the Replies and forwards section.
Check the Open replies and forwards in a new window checkbox.
Click OK.
Can I forward an email as an attachment?
Select the email in the message list.
On the main Outlook Ribbon, select More > Forward as attachment.
Attachments
When you forward a message, the message includes any attachments that were included with the original message. Additional attachments can be added to the message.
Attachments aren’t included when you reply to a message. You can manually add attachments to any reply message.
View email messages by conversation
By default, when you add most account types to Outlook, your messages are displayed in Conversations. A conversation includes all messages in the same thread with the same subject line.
Use Conversation view
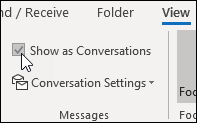
From any mail folder, such as your inbox, select View > Show as Conversations to toggle Conversation view on or off.
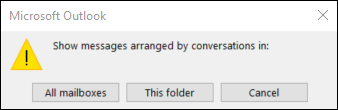
Select All mailboxes or This folder.
Conversations that include multiple messages are identified in the message list by a triangular expand/collapse icon  . Select the icon to expand or collapse a Conversation.
Within each Conversation, messages are sorted with the newest message on top. You cannot change this sort order.
When you receive a new message that’s part of a Conversation, the whole Conversation moves to the top of your message list.
Any Conversation that includes unread messages has a bold subject and the count of the unread messages appears next to the subject. When you expand the Conversation, any unread messages have a bold heading.
Change Conversation options
There are several conversation options you can change.
From any email folder, such as your inbox, select View > Conversation Settings
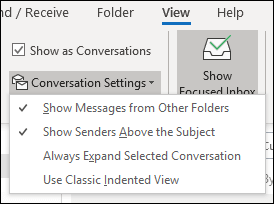
Select any of the available options.
Show Messages from Other Folders Use this option to display messages in the conversation that have been moved to other folders as well as messages you've sent that are stored in your Sent Items folder.
Show Senders Above the Subject Selecting this option shows the sender names at the top of the conversation rather than the conversation subject.
Always Expand Selected Conversation This option applies only to the currently selected conversation. The conversation selected when you check this box will always appear expanded.
Use Classic Indented View Classic indented view shows messages in the conversation indented based on their position within the conversation.
If you would prefer to watch a video on using hyperlinks, then click here
The fastest way to create a basic hyperlink in an Office document is to press ENTER or the SPACEBAR after you type the address of an existing webpage, such as http://www.op.ac.nz. Office automatically converts the address into a link.
In addition to webpages, you can create links to existing or new files on your computer, to email addresses, and to specific locations in a document. You can also edit the address, display text, and font style or color of a hyperlink.
Note:
- If you want to remove links or stop Office from automatically adding hyperlinks, see Remove or turn off hyperlinks.
Create a hyperlink to a location on the web
- Select the text or picture that you want to display as a hyperlink.
Press Ctrl+K.
You can also right-click the text or picture and click Link on the shortcut menu.
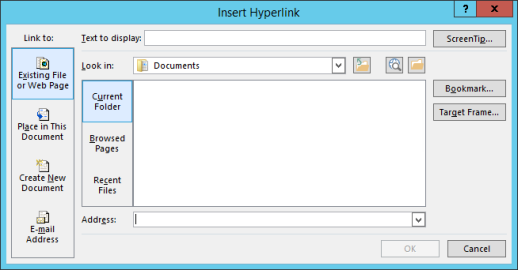
In the Insert Hyperlink box, type or paste your link in the Address box.
(Note: If you don't see the Address box, make sure Existing File or Web Page is selected under Link to.)
Optionally, type different display text for your link in the Text to display box.
(Note: If you don't know the address for your hyperlink, click Browse the Web  to locate the URL on the Internet and copy it.)
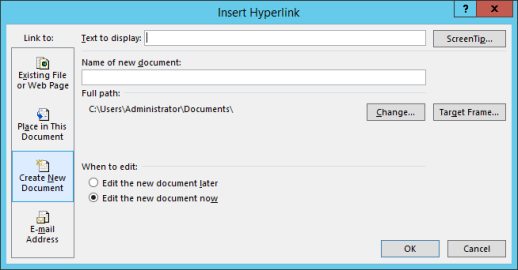
Create a hyperlink to a file on your computer
You can add a hyperlink to a file on your computer, or to a new file that you want to create on your computer.
Select the text or picture that you want to display as a hyperlink.
Press Ctrl+K.
Under Link to, do one of the following:
To link to an existing file, click Existing File or Web Page under Link to, and then find the file in the Look in list or the Current Folder list.
To create a new, blank file and link to it, click Create New Document under Link to, type a name for the new file, and either use the location shown under Full path or browse to a different save location by clicking Change. You can also choose whether to Edit the new document later or open and Edit the new document now.
Create a hyperlink to a new email message
- Select the text or picture that you want to display as a hyperlink.
Press Ctrl+K.
You can also right-click the text or picture and click Link on the shortcut menu.
Under Link to, click E-mail Address.
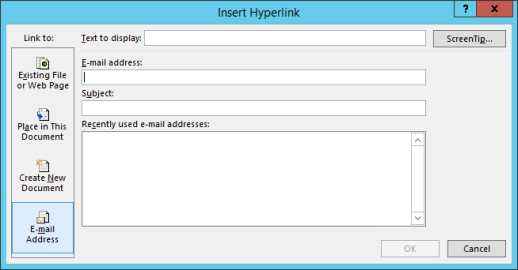
Either type the email address that you want in the E-mail address box, or select an address in the Recently used e-mail addresses list.
In the Subject box, type the subject of the message.
Note: Some web browsers and email programs might not recognise the subject line.
Create a hyperlink to a location in the current document or another document
You can create hyperlinks that link to a Word document or Outlook email message that includes heading styles or bookmarks. You can also link to slides or custom shows in PowerPoint presentations and specific cells and sheets in Excel spreadsheets.
Tips:
To add a heading style, select your heading text, click the Home tab in Word or the Format Text tab in Outlook, and select a style in the Styles group.
Create a hyperlink to a location in the current document
Select the text or picture that you want to display as a hyperlink.
Press Ctrl+K.
You can also right-click the text or picture and click Link on the shortcut menu.
Under Link to, click Place in This Document.
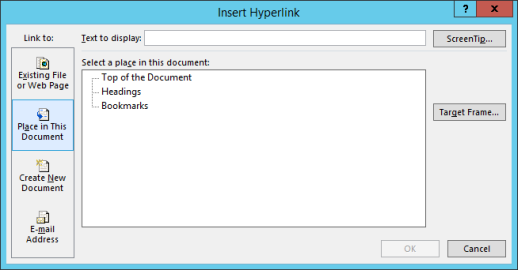
In the list, select the heading (current document only), bookmark, slide, custom show, or cell reference that you want to link to.
Create a hyperlink to a location in another document
Select the text or picture that you want to display as a hyperlink.
Press Ctrl+K.
You can also right-click the text or picture and click Link on the shortcut menu.
Under Link to, click Existing File or Web Page.
In the Look in box, click the down arrow, and find and select the file that you want to link to.
- Click Bookmark, select the heading, bookmark, slide, custom show, or cell reference that you want, and then click OK.
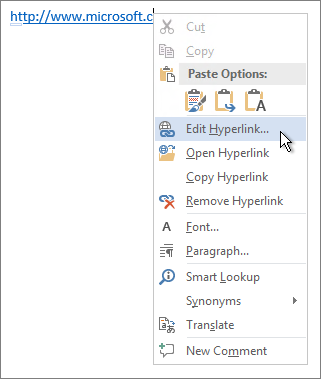
Edit or change the appearance of a hyperlink
- To change the address or display text of a hyperlink you added, right-click the link and click Edit Hyperlink.
To change the appearance of a hyperlink, such as font style, size, or colour, right-click the link and click Font on the shortcut menu, or click a style option on the mini toolbar that appears.
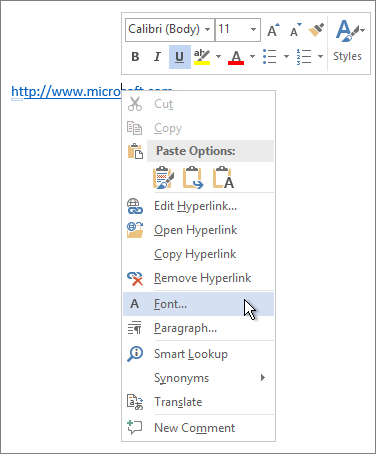
- To customise the ScreenTip that appears when you rest the pointer over the hyperlink, right-click the link, click Edit Hyperlink, click ScreenTip in the top-right corner of the dialog box, and enter the text you want.
^ Go to top
Create a hyperlink in Publisher
Hyperlinks in Word for the web
Insert files or pictures into an e-mail
It's easy to attach pictures, files, contacts, emails and many other items to your Outlook messages. Outlook keeps track of the documents you’ve recently worked on, whether they're stored on your computer or saved in OneDrive (cloud only). And no matter where they're stored, Outlook lets you quickly choose whether to send the document as a traditional attachment or upload it to OneDrive and share a link to the file. You can also set permissions on any file sent from OneDrive that allow message recipients to view and edit them, or share them with others.
To solve problems attaching files, see Solve problems with attachments.
Insert a picture into the body of an e-mail message
When sending pictures, you can either attach the picture to the email message or insert the picture in the message body. To insert a picture that displays in the body of an email message, use the following steps:
- Position your cursor where you want the image in your message.
- In the ribbon, select Insert > Pictures.
- Browse your computer or online file locations for the picture you want to insert. Select the picture, then select Insert.
- To resize the picture, drag the handles at one of the four corners toward the centre of the image or away from the centre.
- Note: For more information about resizing pictures in Outlook, see Reduce the size of pictures and attachments in Outlook email messages
Manage attachments; open, save, and attach files
Email messages that include attachments are identified by a paper clip  icon in the message list.
Security Note:
Outlook accepts a wide variety of different file types, but blocks potentially unsafe attachments (including .bat, .exe, .vbs, and .js files) that can contain viruses. Even with Outlook attachment protection, be careful in opening any attachment, especially if it’s from someone that you don’t know or trust. When in doubt, confirm the authenticity of the attachment with the sender. Also, keep your computer antivirus software up to date.
Most of the time, you'll see attached files in the Reading Pane, directly under the message header or subject. Occasionally, you'll see the attachments in the message body.
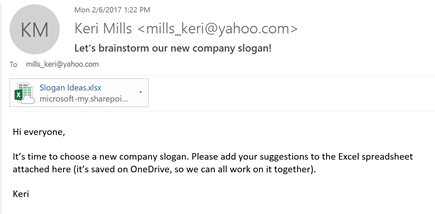
Double-click the attachment icon to open the attachment.
^ Go to top
Saving attachments
To save the attachment, choose the drop-down arrow to the right of the attachment icon to open the attachment menu.
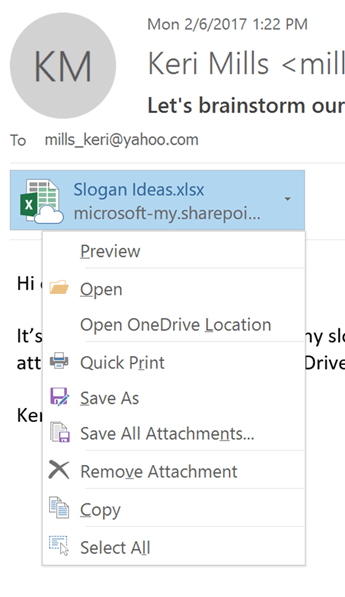
Choose Save As to save one attachment to your computer or cloud storage location. Choose Save All Attachments to save all attachments from a single message. By default, all of your attachments will be saved in your Documents folder but you can choose a different location each time you save attachments.
You can also save an attachment by dragging and dropping the attachment from your email message to your desktop. When dragging and dropping an attachment stored in the cloud, a local copy of the attachment will be downloaded and saved for you.
^ Go to top
Attach a file into an email message
Outlook keeps track of the files you have worked on recently and suggests them whenever you decide you want to attach a file to an email message. Some file types are blocked from being sent or received. See Blocked attachments in Outlook for the complete list.
In a new message, a reply, or a forwarded message, select Attach File from the Message ribbon or the Insert ribbon.
Select your file from one of the following locations:
Recent items
The 12 most recent files you've worked on will be displayed here. These files may be on your computer, on OneDrive, SharePoint, or another online document library. Select a file to attach it to your email.Browse Web Locations
Locations include OneDrive, SharePoint sites, or other locations such as a groups document library that you've accessed before. Select one of the locations to open a new window and then select your attachment.Browse This PC
Opens a File Explorer window where you can choose a file from your computer.
If you selected a file on your local computer or group document library, a copy of the file is attached to the email. Selecting a OneDrive or SharePoint file, however, provides you with additional permission options and information.
Send a link or send a copy Sending a link to the OneDrive or SharePoint file keeps the size of your email message small. If you choose to send a copy of the file, the entire file is attached to the email, just like it would be if you selected a file on your computer. If you choose to send a link to the file, you can also set the permissions on your file.
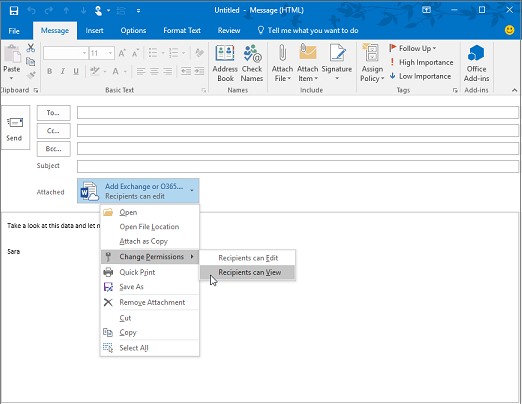
By default, if you're in a business environment, everyone within your organization can edit the linked file. To change these permissions, select the arrow at the right of the attachment name to display a drop-down menu with a variety of permission options.
Organization can Edit if you want anyone in your organization to be able to modify the file.
Organization can View, if you want anyone in your organization to be able to read, but not modify, the file.
Recipients can Edit if you want only the recipients of your email to be able to modify the file.
Recipients can View if you want only the recipients of your email to be able to read, but not modify, the file.
If Outlook detects that your recipients won't be able to view the file, for example if it's stored on a SharePoint site that's only accessible to you, you'll see a warning message directly under the file icon and name. Select Attach as copy to change the attachment from a linked file to a copy of the file.
Note: If you attach a file as a copy, any changes your recipient makes won't be synchronized with the version of the file in OneDrive or on SharePoint.
Warning about forgotten attachments
If you mention an attachment in your email message but don’t include it before sending the message, Outlook will display a warning about the forgotten attachment. You can then decide to add an attachment or send the message without one. 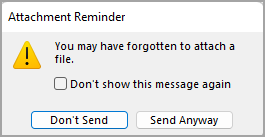
This feature is available only for email text which is formatted in English (US) and is independent of the language used for Outlook. For example, if you use a Spanish version of Outlook and the proofing tools for English (US), you can create an email message with text formatted in English (US). If you mention an attachment in this message but don’t attach one, Outlook will display a warning about the forgotten attachment.
^ Go to top
Attach a business card, a calendar, or other email item to an email message
In a new message, select Attach Item.
Choose one of the following:
Business Card
Choose an electronic business card from your contacts list.Calendar
Choose Date Range, Details, and other options as appropriate.Outlook Item
Choose one or more email messages from any of your email folders.
Select the item you want to attach, and then select Insert.
Learn how to search in Outlook using search filters
Outlook’s search box is a powerful tool to help you find messages, contacts, tasks, and calendar entries.
You can type a number of phrases in the Search box at the top of the Outlook window. In addition to searching for different words and phrases, you can use various operators and keywords to narrow your search results.
To start your search, click the Search box at the top of the Outlook window. You’ll immediately see Suggested Searches. These suggestions are based on your search and message history. Any suggested search with a clock icon to the left will return all messages that contain the search string in the subject, message body, and even any Microsoft 365 attachments.
Use Outlook's built-in search filters
You can find the search box at the top of the screen whether you are using the Simplified Ribbon or the Classic Ribbon.
Outlook provides you with a number of built-in search filters. To use the built-in filters, click in the Search box. Based on your preference, you can use Advanced Search by clicking the filter button on the right side of the search box (shown in the red circle below). Alternatively, the Outlook ribbon will change to show the Search tab and you use any of the options in the Refine group to refine your search results.
Simplified Ribbon view
Classic Ribbon view
Advanced Search view
^ Go to top
Send automatic out of office replies from Outlook
To set up an automatic out-of-office reply in Outlook, follow the following sequence:
- Click File
- then select Automatic Replies
- In the Automatic Replies box, select Send automatic replies.
On the Inside My Organization tab, type the response that you want to send to teammates or colleagues while you are out of the office.
Note!!: Sending automatic replies to anyone outside my organization will send your automatic reply to every email, including newsletters, advertisements, and potentially, junk email. If you want to send automatic replies to those outside your organization, we recommend choosing My contacts only.
There is an option to set a date range for your automatic replies. This will turn off automatic replies at the date and time you enter for the end time. Otherwise, you'll need to turn off automatic replies manually.
Once finished select OK to save your settings.
^ Go to top
Turn off automatic out-of-office replies
When Outlook is setup to send automatic replies, you'll see a message under the ribbon with this information. Select Turn off to disable automatic out-of-office replies. If you want to modify the dates for your automatic reply or the message sent, use the steps above to modify your settings.
^ Go to top
Manage your calendar and contacts in Outlook
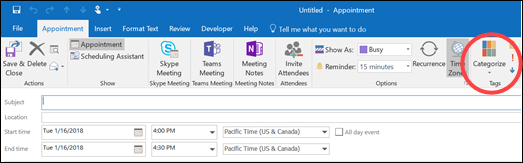
Create an appointment and set a reminder
Appointments are activities that you schedule in your calendar that do not involve inviting other people or reserving resources. You can turn an appointment into a meeting by adding attendees.
- From your Calendar folder, select New Appointment or click Ctrl+N. From any other folder, click Ctrl+Shift+A. This will open an Untitled - Appointment window for you.
Add a Title to the Appointment, the Start and End times and the appointment location (address or you also have access to meeting rooms from this field if you want to turn this into a meeting.)
Note: By default, Outlook starts and ends appointments on the hour or the half hour. If you'd like to enter a custom time, for example 12:22 p.m., click in the start or end time fields and type in the exact time you need.
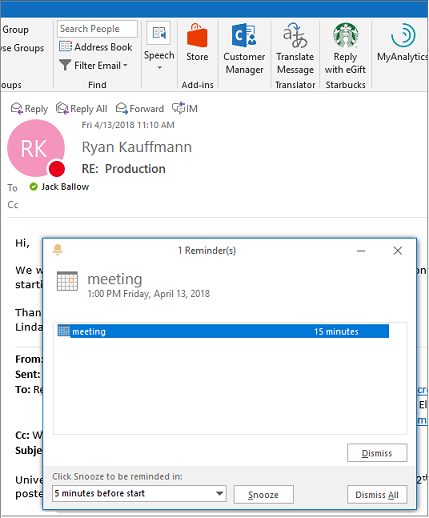
Set or remove reminders
Outlook reminders will pop up over your email or calendar to let you know a scheduled event is about to start.
Add or remove reminders for meetings
This applies to all the existing appointments and meetings in the calendar. Save this setting for future appointments and meetings.
Click File > Options > Calendar.
Under Calendar options, select or clear Default reminders.
Set the default amount of time at which you want to receive reminders before new calendar items (for example, 15 minutes, 30 minutes, etc.).
Set a reminder for an existing meeting
This only applies to the selected meeting in the calendar.
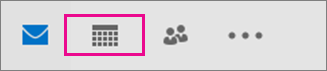
At the bottom of the screen, click Calendar.

Open the meeting. If the Open Recurring Item dialog box appears, do one of the following:
To set the reminder for just one appointment or meeting in a series, select Just this one.
To set the reminder for all the appointments or meetings in a series, select The entire series.
On the Meeting tab (for a recurring meeting it's the Meeting Series tab, click the Reminder dropdown and select how long before the appointment or meeting you want to get a reminder. To turn a reminder off, select None.
Outlook for Windows and Outlook for iOS - Better Together
 If you use Outlook for iOS, your mobile device can remind you when you need to leave to make it to your appointments on time.
Turn on Time To Leave
From Outlook for iOS, select Settings > Time To Leave.
Select a supported account, then use the slider to enable Time To Leave.
Note: Time To Leave is not yet available for Outlook for Android. Only Office 365, Outlook.com, and some Gmail accounts are supported.
Create a recurring appointment and customize your appointment with additional options
Select New Appointment. Alternately, you can right-click a time block in your calendar grid and click New Appointment, double-click any blank area of the Calendar, or use the keyboard shortcut Ctrl+Shift+A.

In the Subject box, enter a description.
In the Location box, enter the location.
Enter the start and end times.
Tip: You can type specific words and phrases in the Start time and End time boxes instead of dates. For example, you can type Today, Tomorrow, New Year’s Day, Two Weeks from Tomorrow, Three days before New Year's Day, and most holiday names.
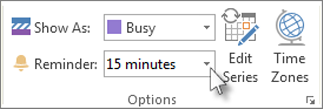
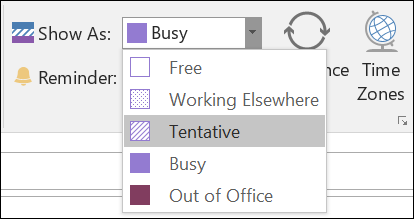
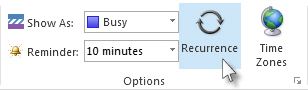
To show others your availability during this time, in the Options group, select the Show As box and then select Free, Working Elsewhere, Tentative, Busy or Out of Office from the drop-down.
To make the appointment recurring, in the Options group, select Recurrence
 . Select the frequency (Daily, Weekly, Monthly, Yearly) that the appointment recurs, and then select options for the frequency. Click OK.
Note: Adding a recurrence to an appointment changes the Appointment tab to say Appointment Series.
By default, a reminder appears 15 minutes before the appointment start time. To change when the reminder appears, in the Options group, select the Reminder box arrow and then select the new reminder time. To turn the reminder off, select None.
Select Save & Close.
Tip: If you want to change an appointment to a meeting, select Invite Attendees from the Attendees group in the ribbon.
Create an appointment or meeting from an email message
There are two ways to create an appointment or a meeting from an email message.
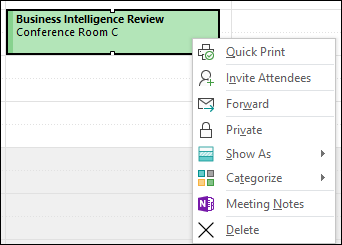
Right-click an email in your inbox, then select Quick Steps > New Meeting. An appointment will open with the email message as an attachment, and you can add attendees to turn the appointment into a meeting.
- Click to select the email message in your message list, then choose Reply with Meeting icon from the Respond Ribbon. This creates a new meeting request with the message sender on the To line and the email message included in the body of the meeting request.
Change or delete an appointment, meeting, or event
You can change an appointment, meeting, or event that you created to update your Outlook calendar and to let other people know about schedule changes.
Important:
You can't change the details for meetings or events other people have invited you to.
When you send an invite in Outlook, you can choose the status to show for the meeting, such as Busy, Away, etc. However, if you later on make an update to the invite, the changes to the status won't be made to the attendee's calendar. A new invite will default to the status set by the invitee. Everyone has control of their own status and can be changed at any time. Updates to the meeting won't override a status for an existing meeting.
Change a single appointment, meeting, or event you created
Open the appointment, event, or meeting from your calendar.
Edit the item details on the Appointment or Meeting tab. When you're done, click Save & Close for an appointment or event or Send Update for a meeting you created.
When changing a meeting you've created, you must send an update in order to save the changes. If you're adding additional attendees to the meeting and making no other changes, you can choose whether to send the update to all attendees or just the added attendees.
Change a recurring appointment, meeting, or event you created
When you open a recurring appointment, meeting, or event, Outlook will ask you if you want to open just this one event or the entire series of events.
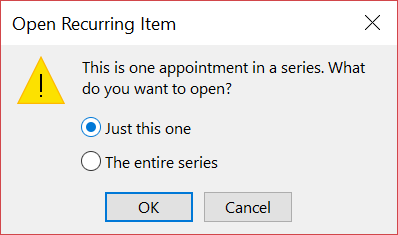
If you'd like to edit a single instance of a recurring item, select Just this one. Otherwise, select The entire series. You can make changes to the appointment, event, or meeting details, recurrence patterns, and attendees. When you're done, select Save & Close for appointments and events or Send Update for meetings.
Some limitations when editing one instance of a recurring item:
You cannot change the date and time of a recurring item if doing so skips over an earlier or later instance of the item. For example, if you have a meeting that occurs every Friday and occurs on 4/5/19, 4/12/19, and 4/19/19, you can't change the 4/12/19 instance to 4/4/19 or 4/24/19 because it skips over another instance of the same appointment or meeting.
If you remove an attendee from one instance of a recurring meeting, that attendee will still be invited to the other instances of the recurring meeting.
Change a meeting you were invited to by others
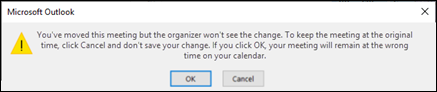
You cannot change the details of a meeting you were invited to by others. If you try to move the meeting on your calendar, Outlook will warn you that the organizer will not be notified of the change and the meeting on your calendar will be at the wrong time.
Change an event to an appointment or a meeting
Events are all-day items that, by default, appear as free time on your calendar. A conference or a vacation is an example of an event.
Double-click the event to open it.
Uncheck the All day event checkbox next to the Start time.

Now that the event is an appointment, the Show As changes to Busy.
If you add attendees, the appointment turns into a meeting.
After you finish making changes, click Save & Close for an appointment or Send Update for a meeting.
Change how an appointment, meeting, or event shows on your calendar
New all day events automatically show as free on your calendar. Meetings and appointments automatically show as busy on your calendar. You can change how any of these items display on your calendar by updating the Show As field.
Open the appointment, meeting, or event.
On the Ribbon, use the Show As drop-down to select Busy, Working Elsewhere, Tentative, or Out of Office.
Click Save & Close for an event or Send Update for a meeting.
At the bottom of the screen, click Calendar.
For appointments or meetings you didn't organize, right-click and select Delete.
For recurring appointments or meetings, you can choose to delete the Occurrence or the Series.
For meetings you organized, right-click the meeting and select Cancel.
For recurring meetings you organized, you can choose to cancel the Occurrence or the Series.
You can also edit the meeting series to change the end date and preserve all past meetings in the series. For more information, see Cancel all future meetings in a series.
Schedule a meeting with other people
You can send a meeting request to one or more people. Outlook tracks who accepts the request and reserves time on your calendar for the meeting. When you create a meeting request, you can add attachments, set a location, and use the Scheduling Assistant to choose the best time for your meeting.
Send an Outlook meeting request
Create a meeting request in one of the following ways:
From the Inbox, select New Items > Meeting or use the keyboard shortcut Ctrl + Shift + Q.

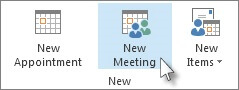
From the calendar, select New Meeting or use the keyboard shortcut Ctrl + Shift + Q.
From an email message in the Inbox, select the Reply with Meeting button.
Add attendees in one of two ways:
Add your attendees to the To line of the meeting request.
Use the Scheduling Assistant to see attendee schedules.
In the Scheduling Assistant, either click the box under your name and type an attendee's name or email address or click the Add Attendees button to bring up your address book.
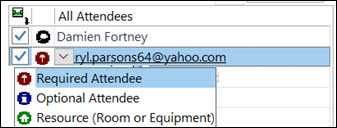
Click the icon next to the attendee's name in the Scheduling Assistant to mark a specific attendee as a Required Attendee ,Optional Attendee, or a Resource. When you start typing a attendee's name, Outlook will provide suggestions for you based on the people you've met with or emailed recently. Choose a name from the list to add an attendee.
Add a meeting subject, start time and end time, and location.
You can start typing a location's name, for example, Fourth Coffee Shop or Conference Room 23, and Outlook will look for location matches. Select one of the suggestions to choose that location or continue typing to enter another location.
Tip: click Scheduling Assistant, then click Room Finder to check availability and reserve rooms.
To attach a file to a meeting request, on the Insert menu, select Attach File, then choose the file you want to add.
If you don't want to make this a recurring meeting, click Send. Otherwise, see Make a meeting recurring.
Note:
Maximising the Appointment window will allow you to see more settings available to you. Also note that a Microsoft Teams meeting link is automatically added to the meeting. You may choose to leave this attached to the appointment invite for those situations where some participants will want to join online via Teams. Alternatively, you can remove the Teams link by clicking Don't Host Online.
Use the Scheduling Assistant
When you create a meeting, use the Scheduling Assistant to see when attendees and rooms are available.
Either read the instructions below or click here to watch a video on how to use the Scheduling Assistant
From a new meeting request, select Scheduling Assistant.
The shaded area with vertical bars shows the meeting time. Drag the bars to adjust the meeting time.
- The grid shows when attendees are available. To the right of the meeting request, Outlook shows suggested times and the number of conflicts.
- You are also given the options to: Add Attendees, Add Rooms or use the Room Finder.
Click here to see a video demonstrating how to respond to an email message with a meeting.
The meeting request invites everyone who is on the To line in the original message as Required Attendees, and everyone on the Cc line as Optional Attendees.
Do one of the following:
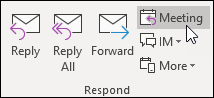
In the message list, select the message, and then on the Home tab, in the Respond group, select Meeting.
In an open message, on the Message tab, in the Respond group, select Meeting.
Enter the location and start and end times as you do in any meeting request. You can also add or remove attendees, use Scheduling Assistant to find the best meeting time, or add attachments.
The header and body of the original message are included in the body of the meeting request.
Conversations and Reply with Meeting
If your message list is arranged by conversation, the meeting request created with Meeting is associated with the same conversation as the original message. The meeting request appears in the expanded conversation.
When you select Meeting on a conversation that is not expanded and contains multiple branches, the meeting request applies to the most recent message in the selected branch.
The Meeting command is not available when you select a conversation header.
Click Meeting > Recurrence.
Note: Use the keyboard shortcut Ctrl+G to schedule the meeting to repeat regularly.
Choose the options for the recurrence pattern you want, and then click OK.
Note: When you add a recurrence pattern to a meeting request, the Meeting tab changes to Meeting Series.
To send the meeting request, click Send.
Add a person to an existing meeting
You can add another attendee to an existing meeting.
If you're the meeting owner:
Double-click to open the meeting, then use the To line or the Scheduling Assistant to add one or more people to the meeting.
Click Send and then select one of the following:
Send updates only to added or deleted attendees.
Send updates to all attendees.
If you're not the meeting owner
Open the meeting request. In the Respond group on the ribbon, select Respond, then Forward. Add one or more recipients to the meeting request.
Click Send. The meeting owner will receive notification that you've forwarded the meeting request to another person. For more information, see Forward a meeting.
If you're using Outlook for Microsoft 365, you can now have Outlook end your meetings a few minutes early. This can help you build in travel time between meetings. You can choose a different duration for meetings under one hour and meetings over one hour.
Select File > Options > Calendar > Calendar options
Check the End appointments and meetings early checkbox.
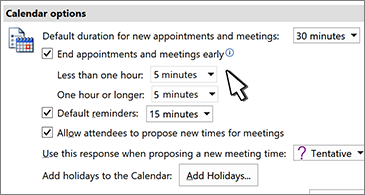
Use the drop-downs to select the number of minutes for meetings less than one hour and one hour or longer, then click OK.
- Select the People icon.
Select New Contact or press Ctrl+N.
Enter a name and any other information that you want to include for the contact.
- Select Save & New to create another contact, or Save & Close if you're done.
^ Go to top
Create a contact group or distribution list in Outlook for PC
Use a contact group (formerly called a “distribution list”) to send an email to multiple people—a project team, a committee, or even just a group of friends—without having to add each name to the To, Cc, or Bcc line individually.
For information about contact groups in for Mac, see Create a contact group in Outlook for Mac.
On the Navigation bar, click People.
Note:
You can find People in one of two places on the Navigation bar.
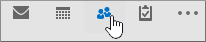
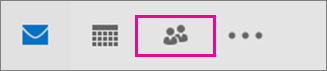
If you're using the compact Navigation bar, click the People icon.

If you're using the expanded Navigation bar, click the word People.
Under My Contacts, select the folder where you want to save the contact group. Usually, you'll select Contacts.
On the Ribbon, select New Contact Group.
Give your contact group a name.
Click Add Members, and then add people from your address book or contacts list.

Note:
To add someone who is not in your address book or contacts, select New E-mail Contact.
Click Save & Close.
To learn how to use your new contact group, see Send an email message to a contact group.
Use an email to create a contact group
If you’re always emailing the same group of people, you can create a contact group (previously called a distribution list) that includes all of the recipients by using a previous email that you sent to them. Then, the next time you want to contact them or schedule a meeting with them, you can add the contact group to the To line of your message, instead of adding each person individually.
Open an email that was sent to the people you want to include in the contact group.
In the To or Cc box, highlight all the names with your mouse.
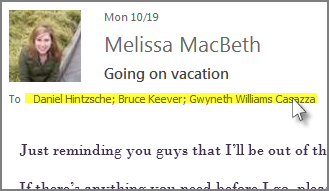
Right-click your selection, and then click Copy, or press Ctrl+C.
In the main Outlook window (not in the opened email message), click People on the Navigation bar
Click New Contact Group.

Type a name for your contact group, like Special Projects.
Click Add Members > From Outlook Contacts.

In the window that opens, right-click inside the Members box, and click Paste, or press Ctrl+V.
Click OK.
The people from the email will appear as a list of members for your contact group.
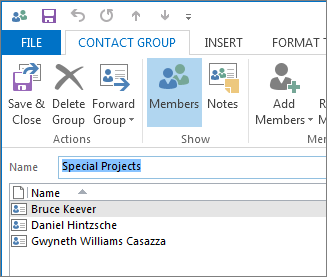
Click Save & Close.
Contact groups show up in your list of contacts, along with individual people. You can tell the difference by the icons that appear to the left of the names in List view. The card icon is for individual contacts and the people icon is for contact groups.

Finally, you can always add people or remove people from the contact group later.
Create a contact group from an Excel list
If you have a lot of business or personal contacts that you keep in an Excel spreadsheet, you can import them straight into Outlook.
Then you can create a contact group (formerly called a “distribution list”) using the imported contact information.
Unfortunately, you can't import a list of contacts from Excel directly into a distribution list, but you can import the contacts into your Contacts folder, then use the instructions above to create a distribution list from those contacts.
For information about importing contacts from Excel, see Import contacts to Outlook.
^ Go to top
Schedule a Teams meeting from Outlook
Schedule a Teams meeting
Microsoft Teams includes the Outlook add-in, which lets you create new Teams meetings directly from Outlook. You can also view, accept, or join meetings in either app.
Outlook on the desktop
Open Outlook and switch to the calendar view.
Select New Teams Meeting at the top of the view.
Note:
Even if you begin by selecting New Meeting or New Appointment, you can make it a Teams meeting by selecting Teams Meeting at the top of the new event form.
Add your invitees to the Required or Optional field(s)—you can even invite entire contact groups (formerly known as distribution lists).
Add your meeting subject, location (if applicable), start time, and end time.
Create your message.
- Select Send.
Note:
The Teams meeting join details are added to the meeting invite automatically.
Outlook on the web
- Open Outlook on the web, select calendar view then select New event
- In the new event form, select the Teams meeting toggle to turn it on.
- After the invite is sent, you'll see the meeting join details in the event.
^ Go to top
You can remove Teams from a meeting while you're creating the meeting, but not after you send the invitation.
Outlook on the desktop
- At the top of the new meeting form, select Team Meeting > Don't Host Online.
Outlook on the web
In the new event form, select the Teams meeting toggle to turn it off.
If you have an Exchange, Microsoft 365, or Outlook.com account, you can send a sharing invitation to other users so they can view your calendar in their own Calendar list.
Calendar sharing isn't limited to the default Calendar folder that is created in all Outlook profiles. You can create additional calendar folders and choose which of those folders to share. For example, you can create a calendar folder for a specific project and share it with your co-workers. Optionally, you can grant them permission to modify the events and appointments in the calendar.
Share your Microsoft 365 or Outlook.com calendar with people inside or outside your organization
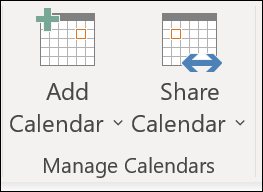
From your Calendar folder, on the Home menu, select Share Calendar.
Choose the calendar you want to share from the drop-down menu.
In the Calendar Properties dialog box, click Add.
You can search for people from your address book or type in their email addresses in the Add box. When you're done adding names in the Add Users dialog box, click OK.
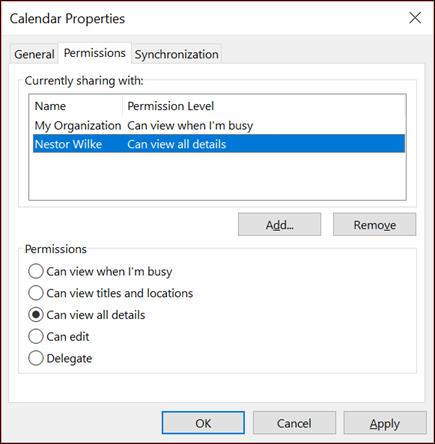
Back in the Calendar Properties dialog box, select the person's name or email address, then choose the level of details that you want to share with the person, then click OK.
The person you've shared your calendar with will receive a sharing invitation by email.
Once the recipient clicks Accept, they'll see your shared calendar in their calendar list.
I see a "This calendar can't be shared" error
If you see a message that says This calendar can't be shared, there are three possible reasons.
The email address is invalid.
The email address is a Microsoft 365 Group
The email belongs to an external user who isn't part of your organization.
What permissions people have to your calendar
You can choose from several different permission levels when sharing your calendar.
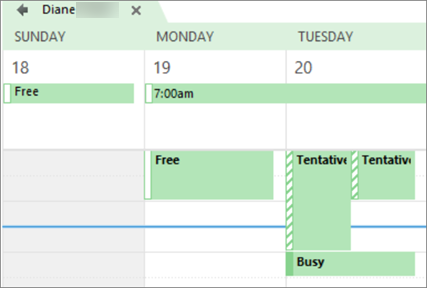
Can view when I'm busy. Those sharing your calendar with this permission level can only see which times you're available, like this:
Can view titles and locations. Those sharing your calendar with this permission level will see availability and the subject and meeting location, like this:
- Can view all details. Those sharing your calendar with this permission level will see all details of your appointments, just like what you see.
^ Go to top
At any time you can revoke access to your calendar. Note that it may take a while for Microsoft 365 and the user's Outlook to sync and remove the view to your calendar.
Click Calendar.
Click Home > Calendar Permissions.
On the Permissions tab, click the user's name and then choose Remove.
Click OK.
See also
Folders provide a way to organize email messages, calendars, contacts, and tasks in Outlook. To add a folder to the folder pane, do the following:
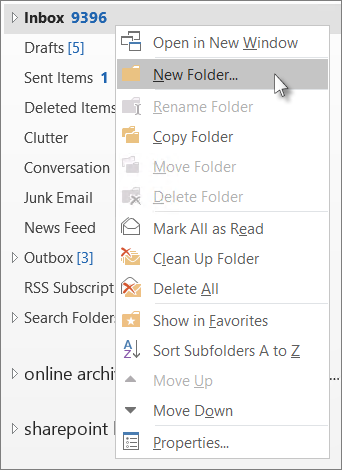
In the left pane of Mail, Contacts, Tasks, or Calendar, right-click where you want to add the folder, and then click New Folder.
Note: When in Calendar, the New Folder command is replaced with New Calendar.
In the Name box, enter a name for the folder, and press Enter.
Move e-mails to another folder
Just as a file cabinet contains folders to help you organize your documents, Outlook gives you a similar way to save and organize email messages. You can move or copy messages between folders in several different ways.
Use drag-and-drop
Use Copy to Folder or Move to Folder
Move or copy using the clipboard
To work with multiple messages, do the following first:
To select adjacent messages, click the first message, and then hold down Shift and click the last message. All messages in the list between the first and last message you clicked are selected.
To select nonadjacent messages, click the first message, and then hold down Ctrl and click additional items.
Move using drag and drop
Select the item you want to move.
Drag to the destination folder, and then release the mouse button.
Notes:
If the folder you want to move or copy the message to does not appear because it is in a collapsed folder, hover the mouse pointer over the collapsed folder icon and the subfolders will appear. Repeat this as necessary until the folder you want appears.
If the item you want to move is a public folder or a SharePoint list, dragging it to another folder results in a Copy operation.
Copy using drag and drop
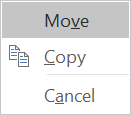
Select the item you want to move by holding down the right-mouse button (or the alternate mouse button if you're using the mouse with your left hand).
Drag to the destination folder and release the mouse button.
When the context menu appears, select Copy.
Move or copy using the Move to Folder or Copy to Folder option
Select the item you want to move.
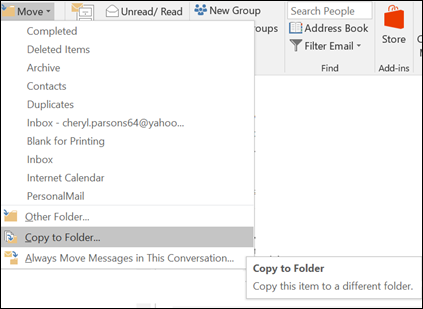
On the Outlook ribbon, select Move.
To move an item to a folder, select the folder from the drop-down list.
If your folder isn't listed, select Other Folder and select the folder from the Choose Folder dialog box.
To copy an item to a folder, select Copy to Folder.
Move or Copy using the clipboard
Select the item you want to move or copy.
To move, right-click and select Cut. To copy, right-click and select Copy.
Alternatively, you can use the keyboard shortcut.
To copy the item: click Ctrl+C.
To move the item: click Ctrl+XNavigate to the folder where you want to move or copy the item to, and then click Ctrl+V.
Always move messages from a specific sender
In four clicks you can create a rule that moves email messages based on the sender or recipients of an email message. For example, if you are reading a message from Anne Weiler, you can create a rule that moves all messages from Anne Weiler to a folder that you specify.
With a message selected and previewed in the Reading Pane or open in its own window, in the Move group, click Rules, and then click Always Move Messages From.
Select a folder, and then click OK.
Note:
You can also create this type of rule by right-clicking a message in the inbox, selecting Rules, and then choosing Always Move Messages From.
The new rule moves all future messages that match the selected sender. The rule also immediately moves any matching messages in the folder that you are reading.
To create advanced rules with more options or to delete a rule, see Manage email messages by using rules.
Delete e-mails and clear Deleted Items folder
Delete all email from a folder
Make sure that the Folder pane is expanded. To expand the Folder pane, click the arrow at the top left of the pane.
In the Folder pane, right-click the folder that you want to empty, and then click Delete All.
When you're prompted to move everything to the Deleted Items folder, click Yes.
All the selected items are now in the Deleted Items folder. See Empty the Deleted Items folder to permanently delete them.
Note:
If you're trying to free up space in your mailbox, you must empty the Deleted Items folder before you can reclaim that space.
Delete multiple emails
You can quickly delete multiple emails from a folder and still keep your unread or important emails for later.
To select and delete consecutive emails, in the message list, click the first email, press and hold the Shift key, click the last email, and then press the Delete key.
To select and delete nonconsecutive emails, click the first email, press and hold the Ctrl key, click each email that you want to delete, and then press the Delete key.
Tips:
To unselect an email, press and hold the Ctrl key, and then click the email.
To select all the emails in the active folder, press Ctrl+A.
Delete all email in all folders
The only way to delete all email in all folders is to right-click each folder in your folder list, select Delete All, and move the items to the Deleted Items folder.
Empty the Deleted Items folder
The items that you delete are moved to the Deleted Items folder, but those items aren’t permanently deleted until that folder is emptied. You can manually empty the folder any time.
In the Folder pane, right-click the Deleted Items folder, and then click Empty Folder.
You’ll be prompted to confirm that you want to permanently delete the items. Click Yes.
Create, change, or customize a view
Views give you different ways to look at items in a folder. Each Outlook folder, such as Inbox and Calendar, allows you to customize your view to change the organization of items, fonts, and many other settings.
The most common change to make to a view is to change the font size in the message list, the Reading Pane, or when composing a message.
Change the font or font size in the message list
Select View > View Settings.
Select Other Settings in the Advanced View Settings box.
Select Column Font or Row Font.
Note: To change the font size of the message preview, sender name, and subject in the default Inbox view, choose Row Font.
Select the font, font style, and size you want, then click OK three times to save your settings and apply your changes.
Note: If you only want to change the font or font size for the message preview (the line of message text you see under the subject and sender, select Font under Message Preview.
Change your font or font size in the Reading Pane
The Reading Pane doesn't allow you to change the default font or font size. However, you can zoom in or zoom out easily. You can also tell Outlook to display all of your email messages in plain text, and have more control over the font size.
At the bottom right corner of the Reading Pane, click the percentage (usually 100%) to display the Zoom While Reading dialog box.
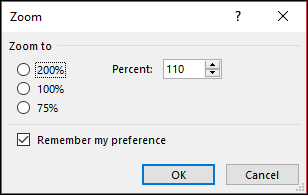
Choose one of the default percentages or enter your own percentage. Select the Remember my preference checkbox to keep your zoom level the same across all messages you receive.
Change the font size for messages when composing, replying, and forwarding
To change the font size for messages when composing, replying, and forwarding, use the following steps.
Select File > Options > Mail > Stationery and Fonts.
Select the Font button for New mail messages or Replying or forwarding messages to change the default font, font size, and font color when composing or replying to messages.
- Click OK twice to save your changes.
For additional tasks, choose from the options below:
Create a new view
Sometimes, it's easier to start with a brand new view rather than modifying an existing view. You can create a new view in any Outlook folder.
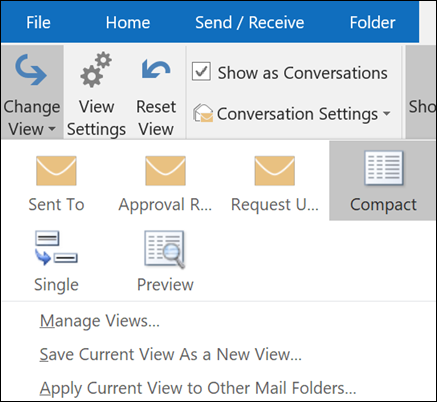
Click View > Current View> Change View > Manage Views > New.
If you want to start from an existing view, in the Manage All Views dialog box, select <Current view settings> and then select Copy.
Enter a name for your new view, and then choose the type of view.
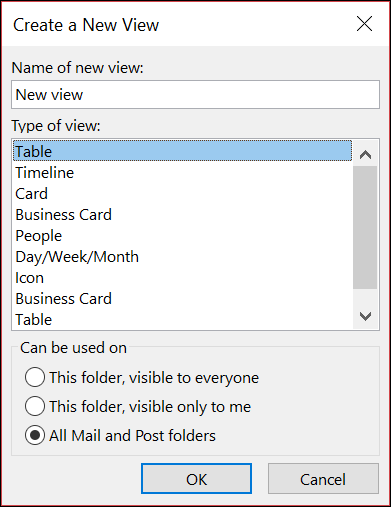
Under Can be used on, accept the default setting of All Mail and Post folders or choose another option, and then choose OK.
In the Advanced View Settings: New View dialog box, choose the options that you want to use, and then choose OK.
To use the view immediately, choose Apply View.
Types of views
There are several different types of views you can choose when creating new view.
Table
A table view shows your information in rows and columns. This is one of the most effective views for email messages.Timeline
A timeline view shows your items along a fixed timeline. It's useful for tasks or for folders that contain a small number of items spread out over a period of time, for example, a collection of twenty emails for a specific project.Card
Card views are typically used for contact folders. In a card view, you'll see a variety of fields that apply to each item, whether they're filled in or not.Business Card
Business card views are typically used for contact folders. In a business card view, you only see fields that contain data.People
A people view is a view of your contacts that doesn't show the same level of detail you see from Card or Business card views. You'll see a list of your contacts with their name and photo.Day/Week/Month
A Day/Week/Month view is typically used for Calendar folders, but you can use it for email folders as well.Icon
An icon view shows your items with an icon and their subject. This view is useful for folders with few items or for notes folders.
Delete a custom view
Important: You can't delete a predefined view, even if you changed its settings.
On the View tab, in the Current View group, choose Change View > Manage Views.
Under Views for folder, select the custom view that you want to remove.
Choose Delete, confirm deletion, and then choose OK.
Create and assign color categories
Color categories allow you to easily identify and group associated items in Microsoft Outlook. Assign a color category to a group of interrelated items—such as notes, contacts, appointments, and email messages—so that you can quickly track and organize them. You can also assign more than one color category to items.
You can choose from a set of default categories or create your own, and then assign the categories to your Outlook items. The category colors are displayed in table views, such as your Inbox, and within the open items themselves. You can rename the categories to something more meaningful to you or choose different colors for the categories. This flexibility enables you to design a color category system that fits your personal work style.
Assign a color category to an email message
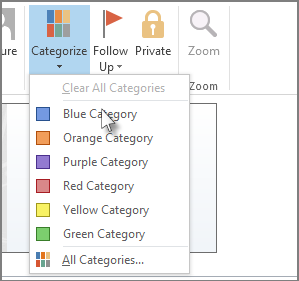
To assign a color category to a message from the message list, right-click the message. Select Categorize, then select a category from the list.
Tip:
If you right-click the message and you only see options to flag the message, try right-clicking in the blank space to the right of the sender's name.
Note:
If you want to assign a second or third color category, you can perform this action multiple times.
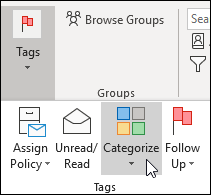
To assign a color category from the reading pane or an open message, select Categorize from the Tags group on the ribbon and then select a category from the list.
If you don't see Categorize on the Ribbon, select the drop-down under Tags.
Note:
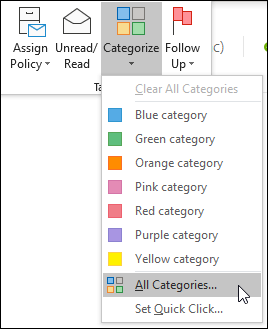
The Categorize drop-down displays the ten most recently used categories. If you have additional categories, you'll need to select All Categories to see the rest of the list.
Rename a color category
The default color categories have generic names, such as Red Category and Blue Category. To easily identify and organize your categorized items, you can rename the color categories by using names that are meaningful to you.
Notes:
The first time that you assign an existing color category to an item, you will be prompted to rename the color category.
If you change a color category that is already assigned to items, all of the items that have that category assigned are updated to the new name.
On the toolbar, select Categorize
 .
.Select All Categories.
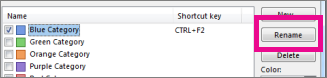
In the Name list, select the name of a color category, and then select Rename.
In the Name list, type the new name for the color category.
To automatically assign the color category that you are renaming to items that are selected in the main Outlook window, select the check box next to the color category in the Name list, and then select OK.
Create a color category
In any message folder, in the Tags group on the Ribbon, select Categorize > All Categories.
Note:
For calendar items, the Tags group appears on the Appointment or Meeting tab. For an open contact or task, the Tags group appears on the Home tab.
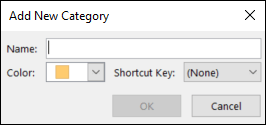
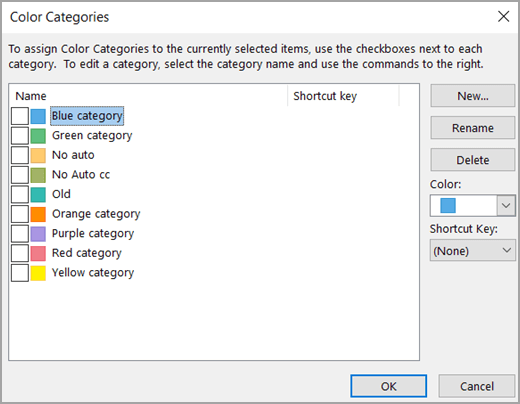
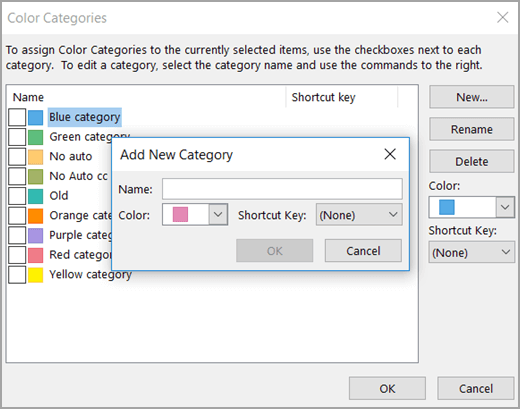
In the Color Categories dialog box, select New.
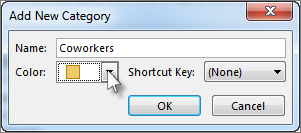
Type a name for the category and select a color and optionally, a shortcut key. Then select OK.
Set a Quick Click category and assign it to messages
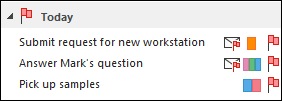
A Quick Click category is a default category that you can set in certain table views. For example, if you turn off the reading pane or move the reading pane under your message list, you'll see additional columns in your Inbox, including Received, Category, and Mention. To assign a Quick Click category in one of these views, you can click in the category column to set a category.
On the ribbon, in the Tags group, select Categorize > Set Quick Click.
Use the drop-down to select a color category, then select OK.
Tip:
From an open message, you can click Set Quick Click on the Categorize menu to set the default color category for all future messages, not just the message that is selected.
Assign a shortcut key to a category
By associating a keyboard shortcut key with a category, you can quickly assign the category to an item, such as an e-mail message, by selecting the item in your Inbox or another category view and then pressing the shortcut key. You can also use the shortcut key to assign a color category to multiple items at the same time.
On the toolbar of the main Outlook window, select Categorize
.At the bottom of the menu, select All Categories.
In the Name list, select the check box for a color category.
In the Shortcut Key list, choose a keyboard shortcut.
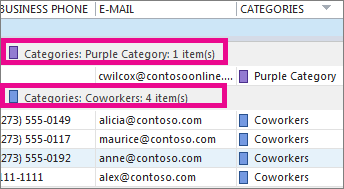
Organize your contacts with color categories
The fastest way to organize your contacts is by color—such as blue for coworkers, red for family and friends, and green for community organizations and members. Either use the built-in color categories or create your own, and rename them to something meaningful (such as “Coworkers” instead of “Blue”). Then sort by color to focus on the contacts you want.
The built-in color categories include blue, orange, purple, red, yellow, and green. To add an existing contact to one of these categories:
Click People.
If you see icons instead of words, you can click the People icon or use the tip below to change what you see.
Tip:
To change navigation options from icons to words, click the three dots next to the icons, click Navigation Options..., and uncheck Compact Navigation.
Right-click the contact you want to categorize, click Categorize, and then click the color you want.
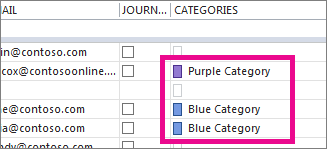
To tell what category a contact has been assigned to, in your list of contacts (View > Current View > Change View > List), scroll to the right to see the Categories column. Any assigned categories will appear there.
Tips:When you create a contact, you can also assign it to a color category. When filling in all the new contact information in the Contact box, click Categorize, and then pick the category you want.
Rename a color category
To help you remember what a color category is for, you can change its name to something more meaningful. For example, if you’re using the Blue Category for coworkers, you can rename it Coworkers.
Click People > Home > Categorize > All Categories.
Click the category you want to rename, and then click Rename.
- Type your new category name.
Tip:
To make it easy to add contacts to this category, pick a shortcut under Shortcut Key. Then, the next time you want to assign contacts to this category, select them in your contact list and press the shortcut key.
Create a color category
Want to use a different color for a category? Just create one.
Click People > Home > Categorize >All Categories.
Click New, type the name you want to use, and then click the arrow next to the Color box to pick your color.
Tip:
To make it easy to add contacts to this category, pick a shortcut under Shortcut Key. Then the next time you want to assign contacts to this category, select them in your contact list and press the shortcut key.
Sort contacts by color category
When you’re done assigning color categories to people, you can quickly sort your contacts by color to see the ones you want.
Click People.
Click Home, and then in the Current View group, click List.
Scroll all the way to the right in your list of contacts to see the Categories column.
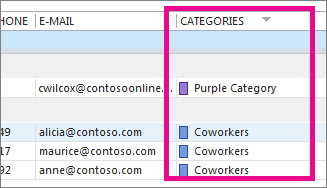
Click the Categories column header to sort the list by color. For each category, you’ll see a subheading with a list of all the contacts in that category.
Assign a color category to a calendar appointment, meeting, or event
You can track all items related to a particular project or task by using color categories to easily identify and organize the items. Besides calendar items, you can assign color categories to contacts, messages, tasks, notes, and journal items.
Color categories connect your calendar items for easy identification. The color categories connect you to other related items too, such as messages or contacts.
Categories only apply to items in your calendar. If you apply a color category to a meeting request or a meeting you've received from another person, that color category will only show in your calendar.
The same categories list is used for all Outlook items, including email messages, tasks, and contacts. If you don't see the category you need in the list, choose All Categories. From there, you can view additional categories not shown on the right-click menu or create and assign new color categories.
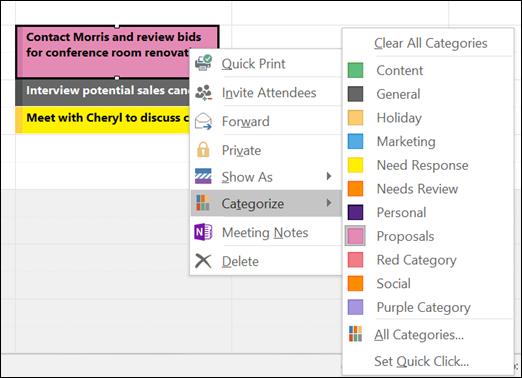
To assign a colour category to an appointment, meeting, or event, use one of the following options:
From your main calendar view, right click the appointment, meeting, or event, point to Categorize
, and then click a color category.From an open appointment, meeting, or event, look for the Categorize button
on the ribbon, in the Tags group.
To see more categories or to create a new category, click All Categories to open the Color Categories dialog box.
To assign a color category from the Color Categories dialog box, select the check box next to the color category. The Color Categories dialog box is also a quick way to assign multiple categories to an item.
The first time that you assign a default color category to an item, you will be prompted to rename the category. At this time, you can also change the color of the category and choose a keyboard shortcut.
Notes:
You can change the color associated with a category at any time.
Another way to open the Categorize menu and Color Categories dialog box is by clicking Categorize
on the toolbar.Only the 15 most recently used color categories appear on the Categorize menu. To see the rest, click All Categories on the Categorize menu.
Further information:
Contact: Information Systems and Support through case creation.
 OP SIGN IN
 GUEST
GUEST